Get in touch
555-555-5555
mymail@mailservice.com

FORMS: Kickoff Forms
What is a Kickoff Form?
Instead of manually adding contacts into your CRM, you can provide a Kickoff Form for your contacts to fill out and add themselves into the platform. You can also create an approval process by choosing not to send the portal access invitation immediately so that you can send it after review of the registration submission. Existing contacts can also complete a Kickoff Form to update their information. You can also have a staff member fill out the Kickoff Form in lieu of the contact; more information is in the sections below.
Kickoff Forms can be embedded inside the portal, but typically you would embed one externally, such as on a page on your website, or provide a link.
Potential contacts can also register with an associated company, including as a primary contact.
You can also use a choice block to customize a contact's registration based on their choices!
How Do I Create a CRM Kickoff Form?
Navigate to the menu item, and click +Create Form.
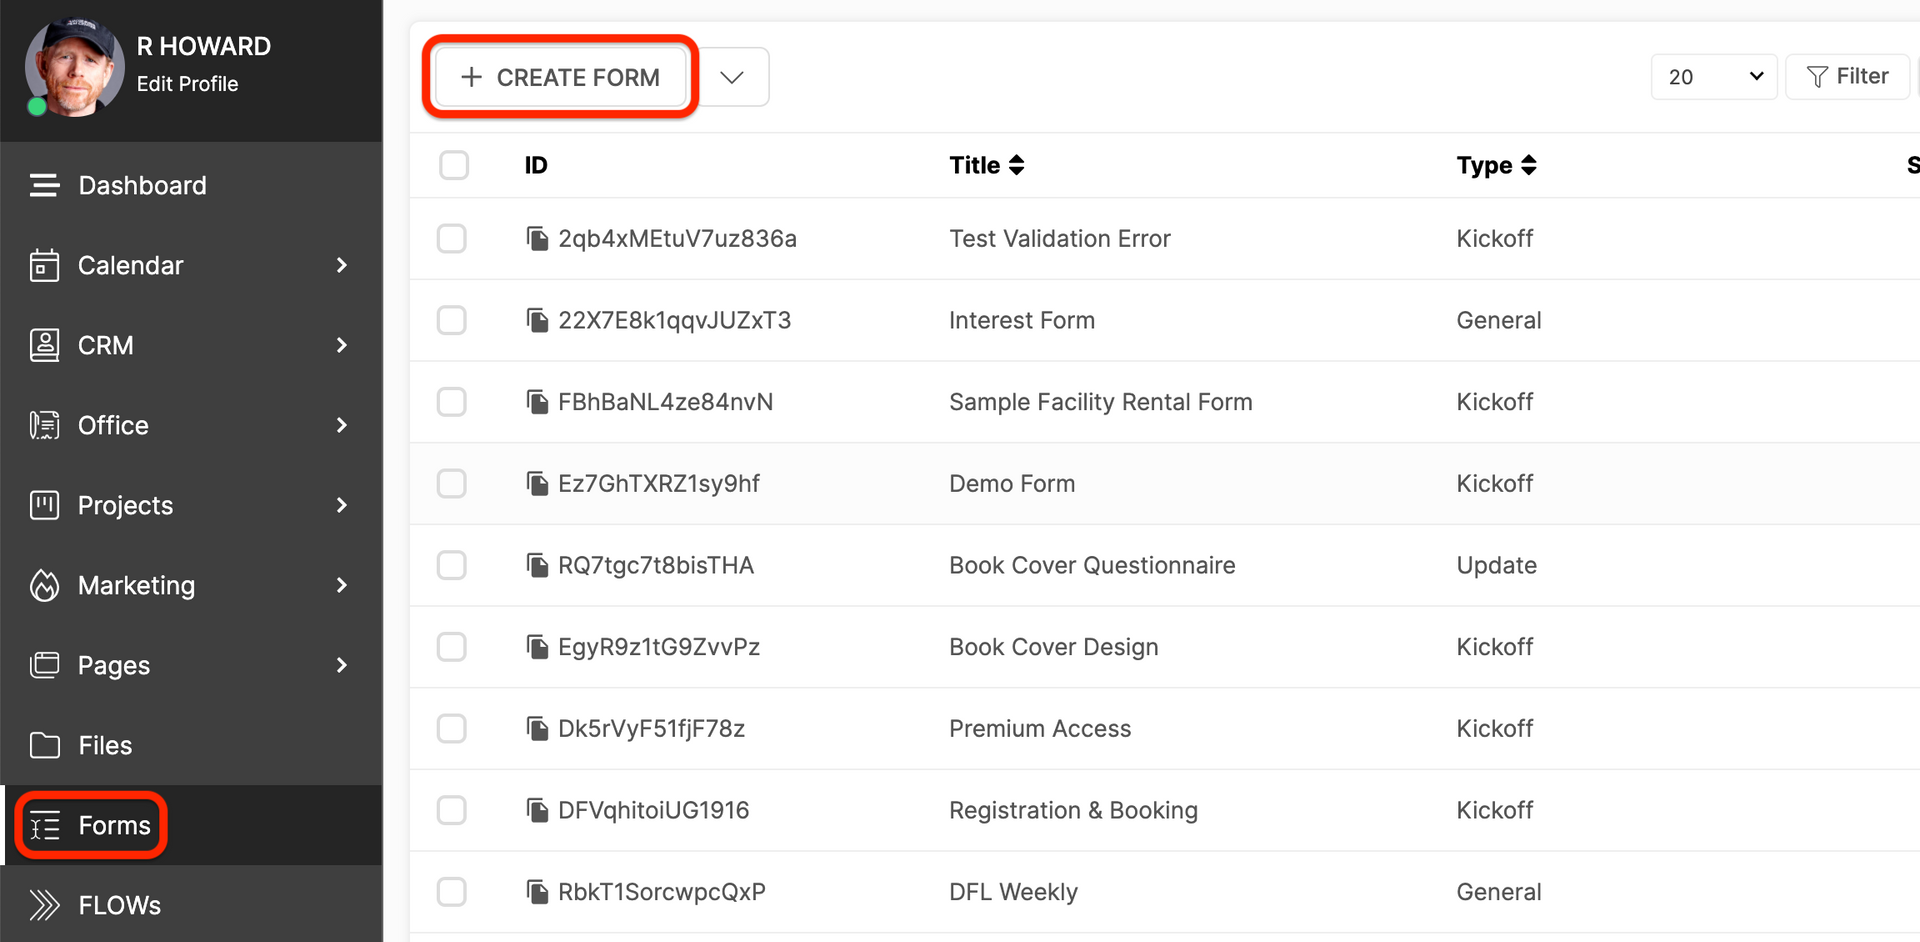
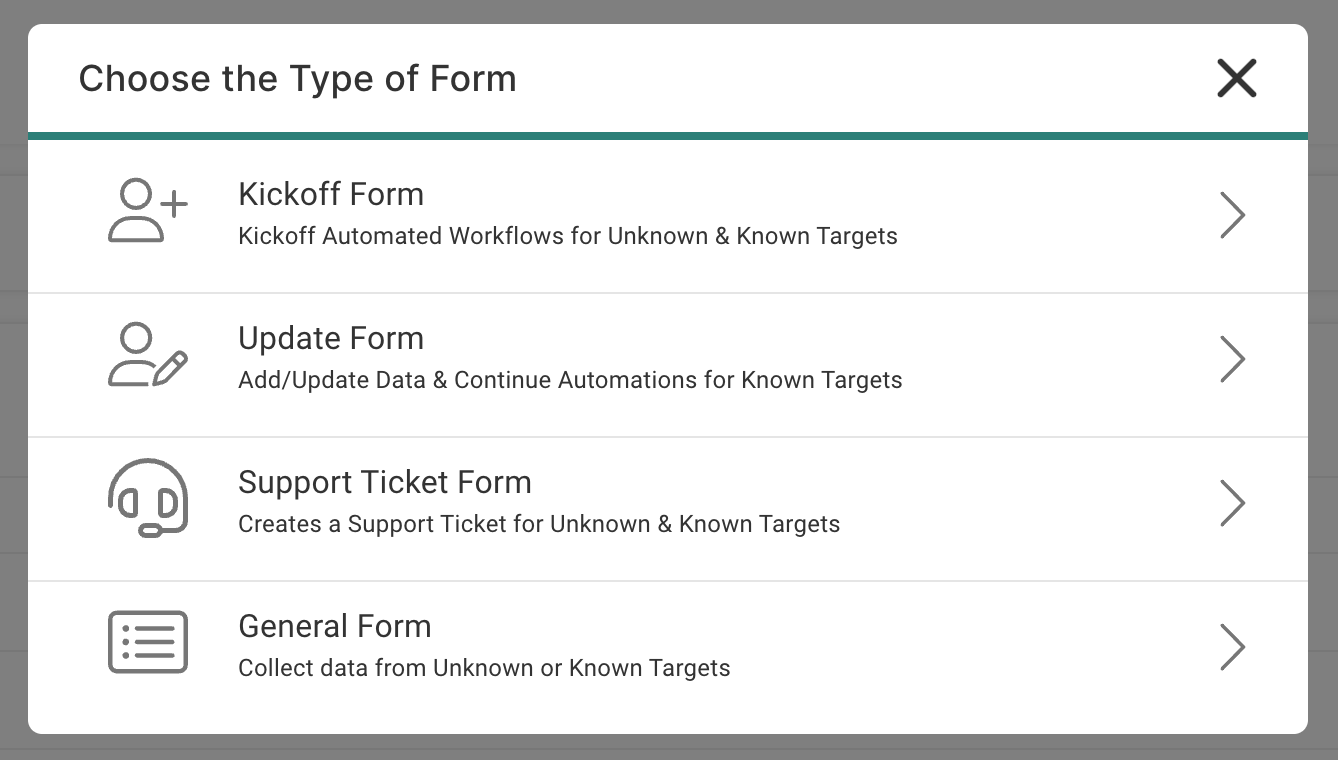
You will then be able to choose Kickoff Forms. Alternatively, you can click the icon beside the +Create Form button and choose from the dropdown menu.
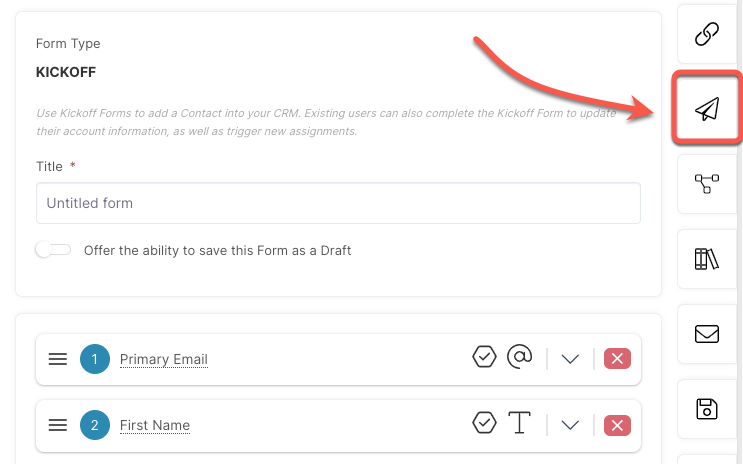
From here, you will be able to build your Kickoff Form.
Start by giving your form a Title. By default, "Untitled Form" is populated into this field.
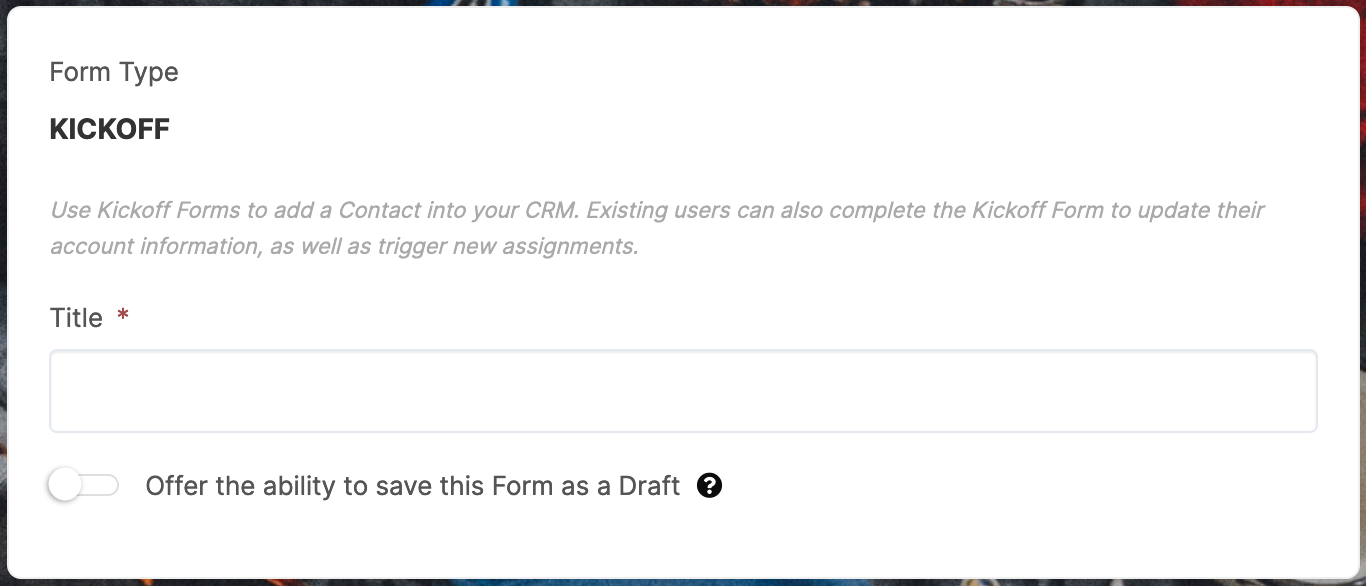
Allow the Contact to Save the Form as a Draft.
- You can decide if you'd like to offer the option for your end user to save the form as a draft. If enabled, the target will see a "Save Draft" button alongside the "Submit" button whenever the form is displayed.
- The target can save a partially completed form as a draft and return to it at any time to complete the form. Be aware that this feature uses cookies to accomplish the goal, so if the target clears their browsing cache or prevents cookies, this feature may not work as intended.
Building Your Form Fields
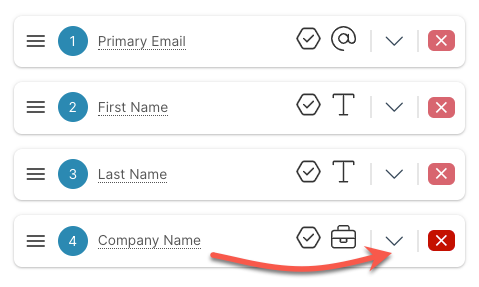
You'll see an initial set of Form Blocks by default. These are required for all Kickoff Forms and cannot be removed, but you can rearrange the order and change the name of the fields.
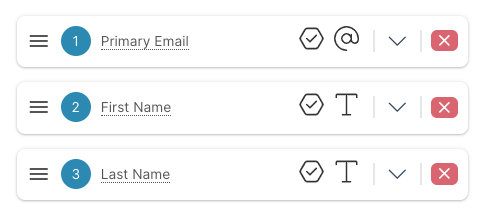
Each default or custom Form Field will display icons to help you quickly identify what type of field it is.
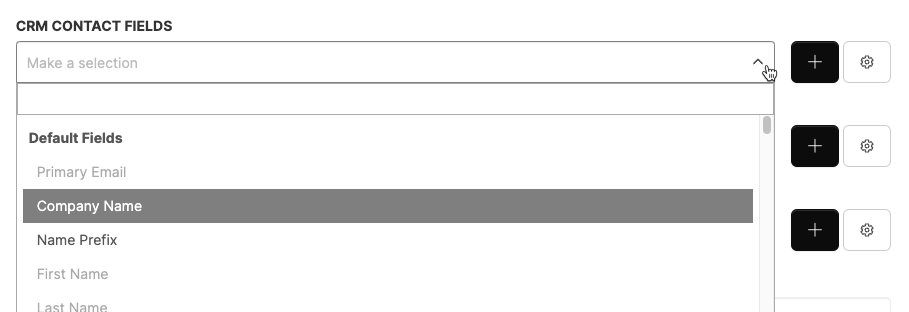
How Do I Associate a Contact With a Company?
Your contact may or may not be associated with a company, so if you want to ask for a company, you'll need to take these steps to insert a company name field into your form.
First, you'll need to select the Company Name field from the CRM Contact Fields dropdown menu. This will associate the contact with the company.
When the field is added to the list, click the arrow icon to expand the pane.
From here, you have a variety of configuration choices;
Select a single existing Company and add all contacts to that Company.
- If you want every contact that completes the form to be added to a company that already exists in your CRM, then you should select that company from the dropdown menu. This may be useful if you are creating a dedicated Company-specific form that will add every contact to a single specific company. This is likely not a common use case, but it is supported in this way.

Allow the contact to freely type in their company name.
- If you want the contact to have the ability to freely input their company name, then you should toggle ON the "Allow open-ended input of Company Name." Understand that the platform does not offer the option for the contact to choose from existing companies in the CRM because that would expose all the companies in your CRM to the public, and every person who can view this form.
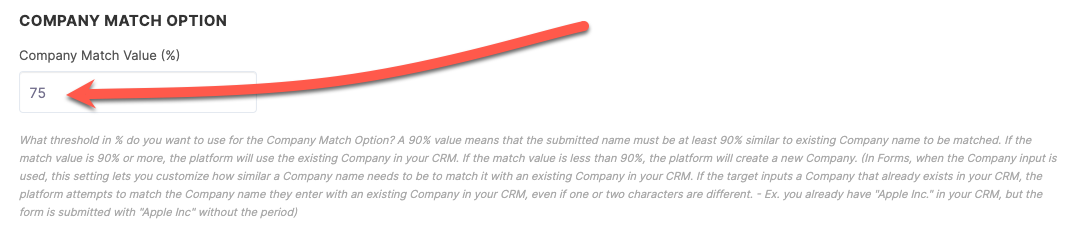
- When you allow the open-ended input of the company name, the platform will attempt to match what is typed with existing companies in your CRM. Please see below to understand the "Company Match" option and how it is used. With this option enabled, there is the possibility of duplicate companies (depending on the match value % that you choose).

TIP: In CRM > Settings > Company Settings, you can change the company match option setting to your desired value.
Allow open-ended input of Company Name
- Enabling this feature will automatically insert a company field into your form. When filled in by the contact, they will be associated with that company if a close enough match is made. This allows for variations and typos.
- By default, enabling this option will NOT create a new company if no match is detected. This is useful if you would rather manually create the new companies as needed.
Create a company if no match can be made.
When the company field is filled in by the contact, if no matching company is detected a new one will be created. When a new company is created via this logic, the contact completing the form will automatically be assigned as the primary contact.
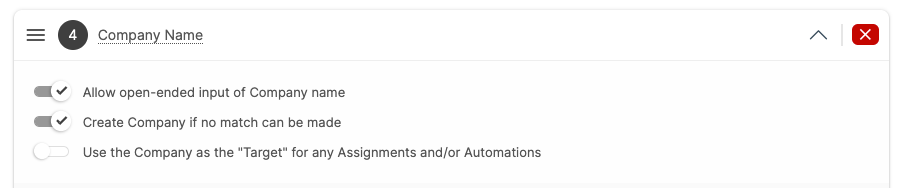
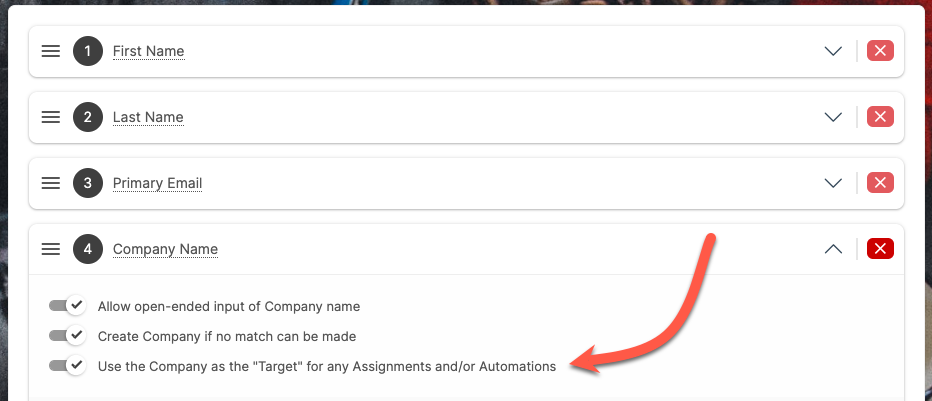
Use the company as the "Target" for any assignments and/or automations.
When you enable this setting, all assignments and/or automations will target the company instead of the primary contact (the individual).
This means that if the form is configured to Add to Circle(s), trigger an O-D invoice generator, add to marketing audience, etc... all of those assignments and automations will be targeted towards the company.
When the primary contact enters the portal (if you invite them), they will enter as a representative or the company.
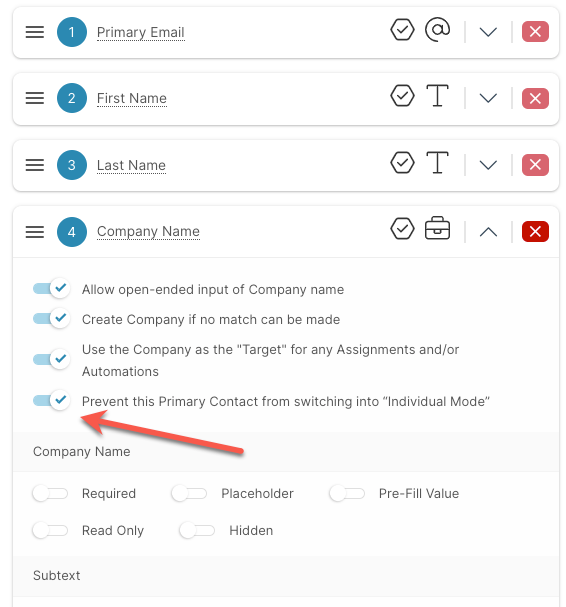
Prevent this Primary Contact from switching to "Individual Mode."
- Clicking this setting will prevent the primary contact from switching into individual mode. This means that the portal that they enter and navigate is the company portal and they will not be able to switch to their individual portal in the flyout menu.
- The option to 'Prevent this Primary Contact from switching into 'Individual Mode'' will only work for unknown targets. Any primary contacts that are already in the CRM will not be affected. To change known contacts, please execute this in the contacts profile or via bulk edit.
- If 'Prevent Switching' is enabled, the primary contact will be hidden from all areas from the platform except for the contact list. This is to prevent automation and assignments being accidentally applied to the individual primary contact rather than the company.
IMPORTANT: If you manually create a custom field, call it "Company" and then add it to the form, it will not work in the way described above. You must use the default company field provided by the platform. Please use the toggle option detailed above to include the Company Field into the form.
Custom Fields
Use the dropdown menu to choose Custom Fields to add to the form. Any custom fields you have already created will be in the list. You can also click Create Custom Field to create new ones.
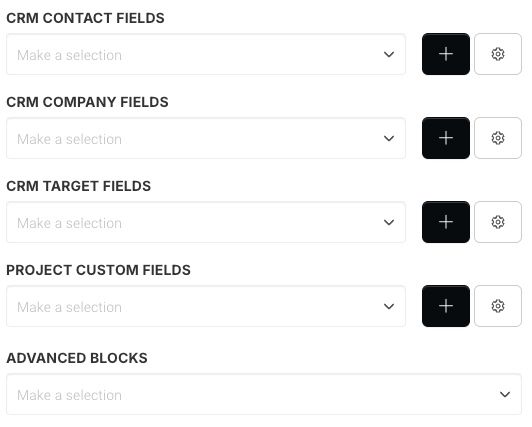
The dropdown arrow for each CRM Custom Field will show all default fields and custom fields that are already available for the custom field type, whereas Project Custom Fields only show custom fields as there are no default Project Fields.
To add additional Custom Fields click the + button next to the required Custom Field Type and add your details.
Once you add the field, you can rearrange the order by clicking the three bars and dragging them into place. You can delete a field by clicking on the red x icon.
To Configure Settings for a Field, Click the Arrow.
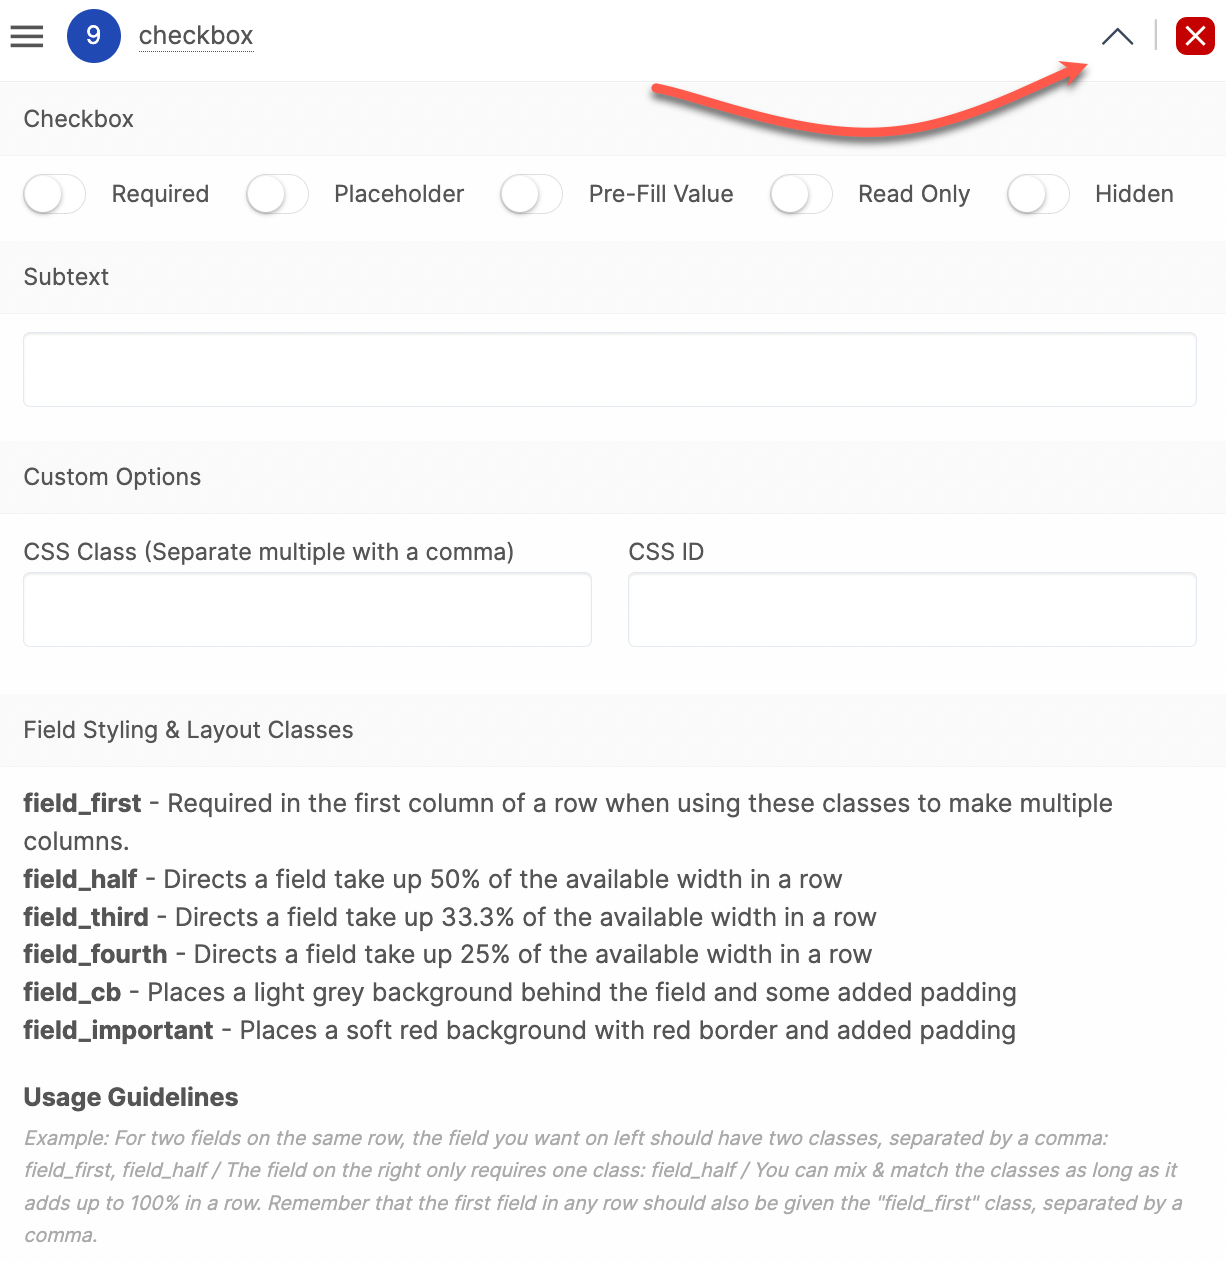
Required: This field will be required to have input and the user will be unable to submit the form until it is filled out.
Placeholder: The field will be open for any data input.
Pre-Fill Value: The value you input into the provided field will be shown by default.
Read Only: The field will be seen by the user, but no action will be needed.
Hidden: The field will be hidden from view and the user will be unable to input any data into it.
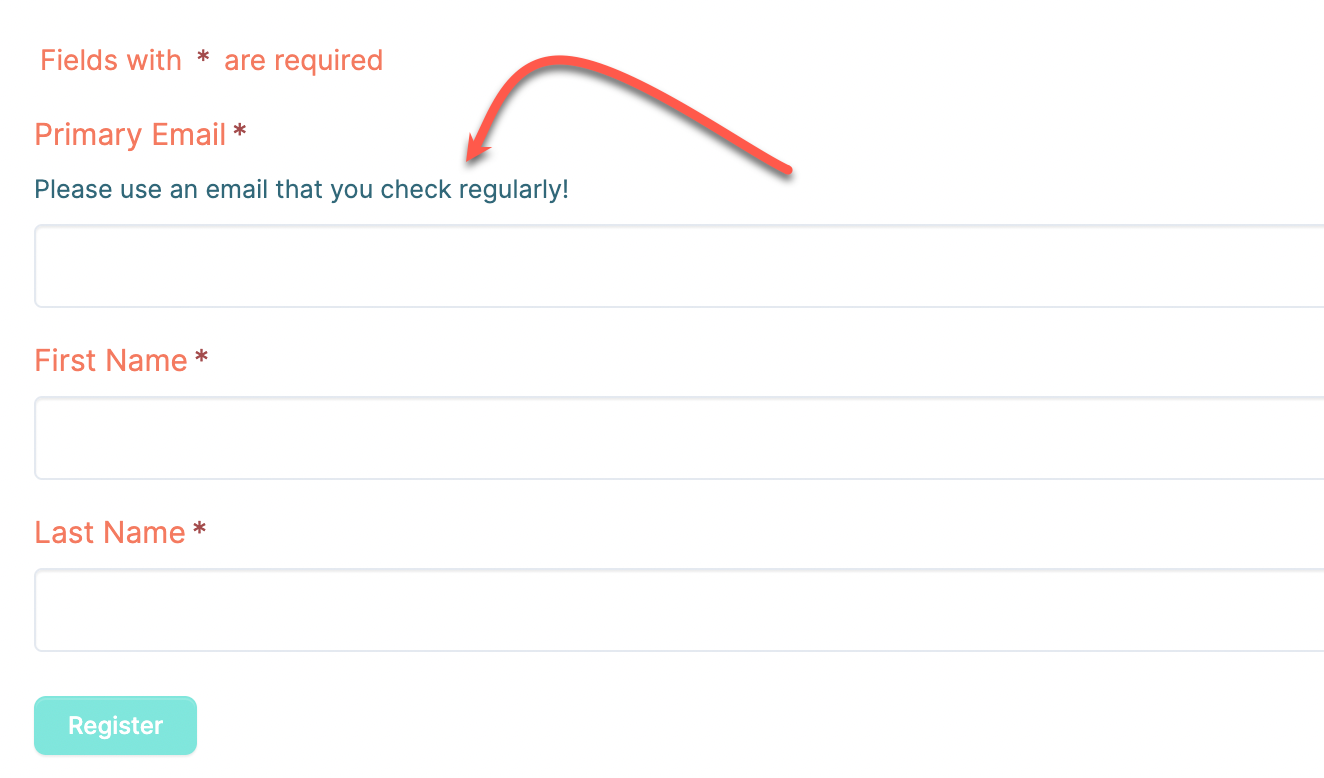
Subtext: This is a secondary title for a field. You can use this to fill in a description, give an example, or for general information that you think will be useful to your contact filling out the form.
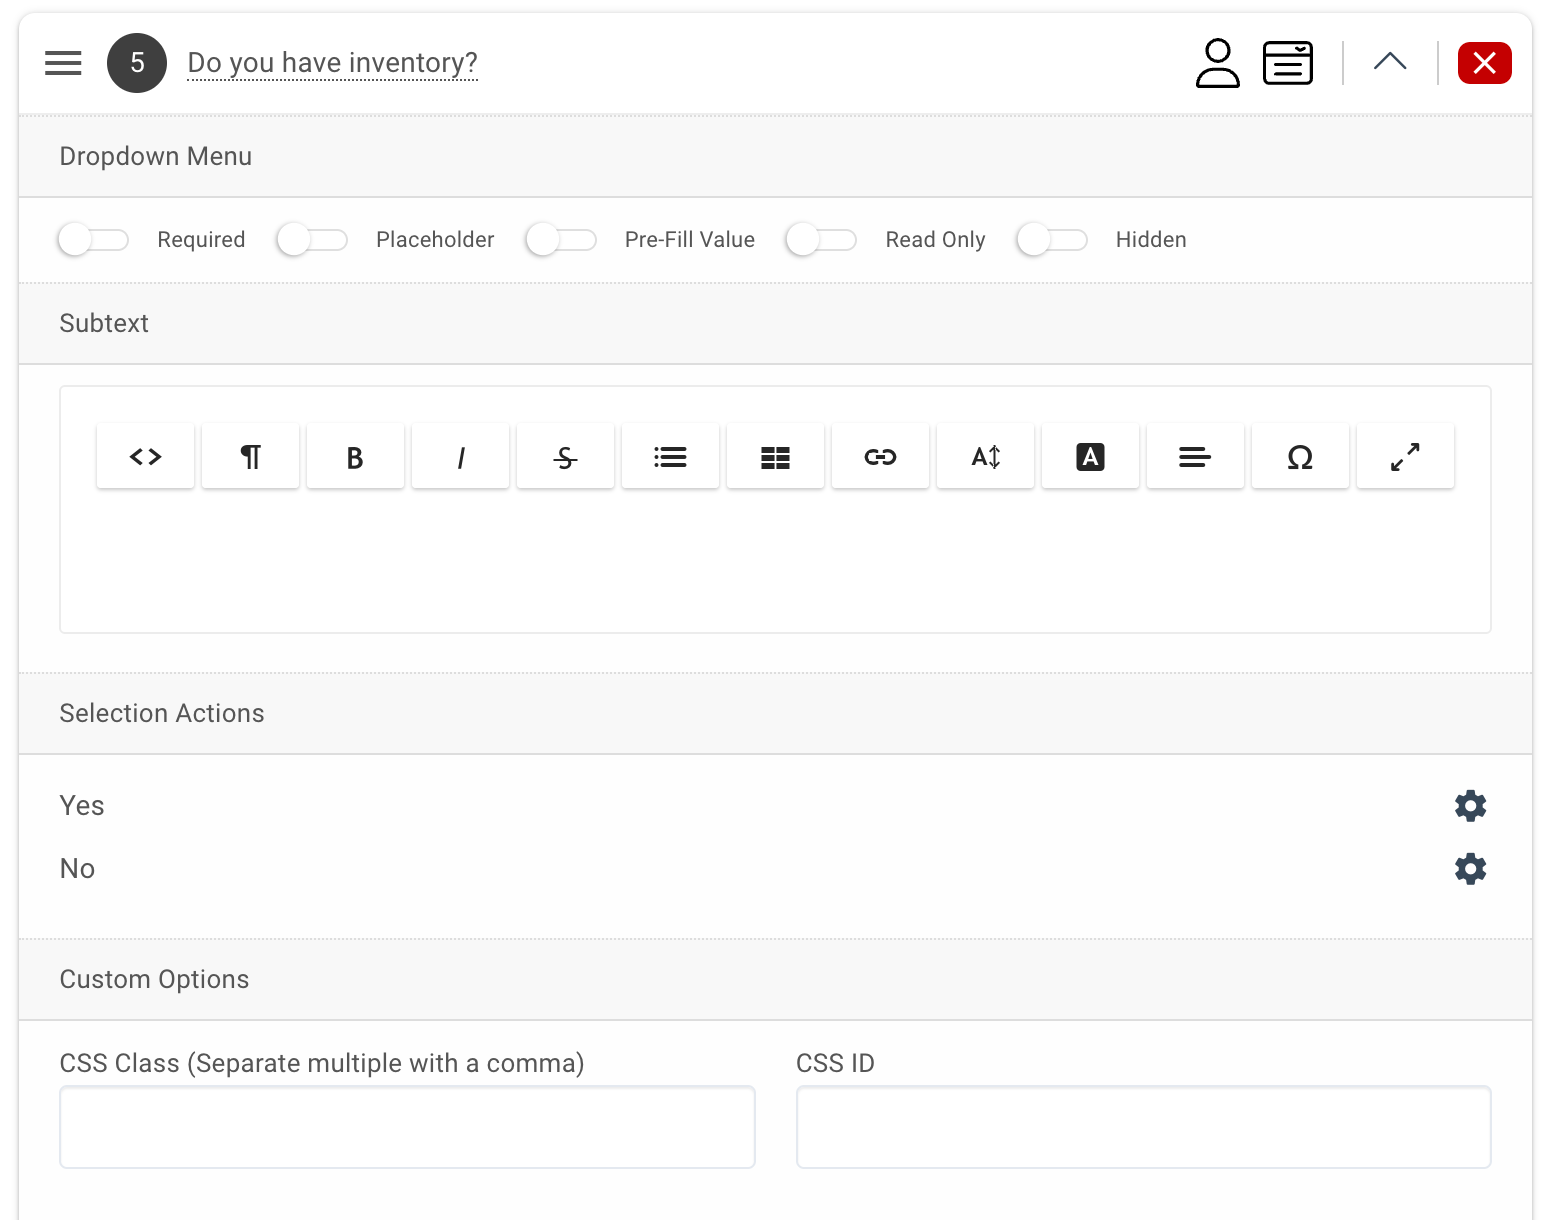
Selection Actions: Form field choice actions are available for radio button, checkbox, and dropdown selection custom fields.
CSS Class: This field allows you to add your own custom CSS class to the form field. You can then target this class in Custom CSS on the Link/Embed tab. You can have multiple classes per field but you will need to separate each class with a comma. Let your imagination run wild!
CSS ID: This field allows you to add a CSS ID to your form field. You can then target this ID within your custom CSS on the Link/Embed tab.
Field Styling & Layout Classes: This selection contains pre-made CSS classes that will allow you to customize your fields without having to do the code yourself! See the section below for more information.
Field Styling & Layout Classes
Below are the classes that are available for you to use. You can have up to 4 columns per row and you can even mix & match as long as the percentages equal 100%. We also have some style classes that will allow you to add emphasis to the important fields.
field_first - Required in the first column of the row when using these classes to make multiple columns.
field_half - Directs a field to take up 50% of the available width in a row.
field_third - Directs a field to take up 33.3% of the available width in a row.
field_fourth - Directs a field to take up 25% of the available width in a row.
field_important - Places a soft red background with red border and added padding.
Usage Guidelines Example: For two fields in the same row, the field you want on the left should have two classes, separated by a comma: field_first, field_half / the field on the right only requires one class: field_half / you can mix & match the classes as long as it adds up to 100% in the row. Remember that the first field in the row should also be given the "field_first" class, separated by a comma.
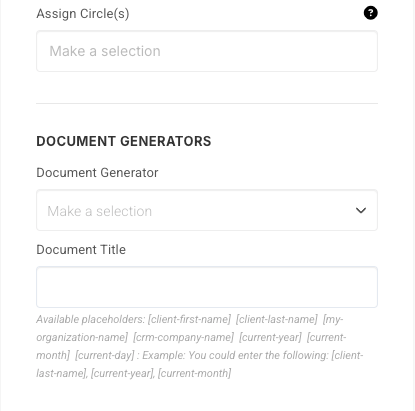
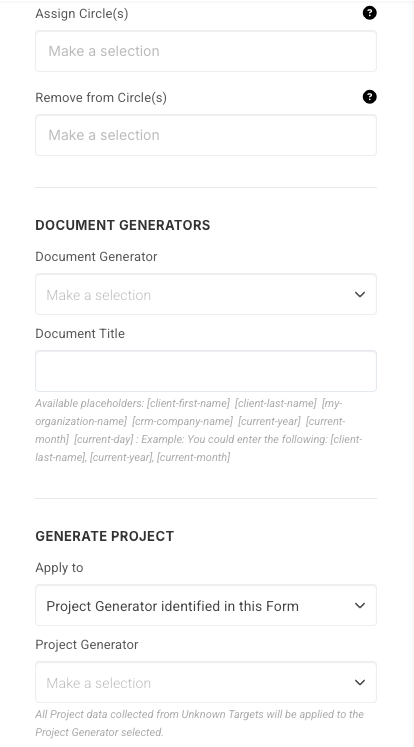
How Can I use Project Custom Fields?
You can use the Project Custom Fields dropdown to select a Project Custom Field that you created earlier using Custom Fields or you can create a new one by clicking the + button.
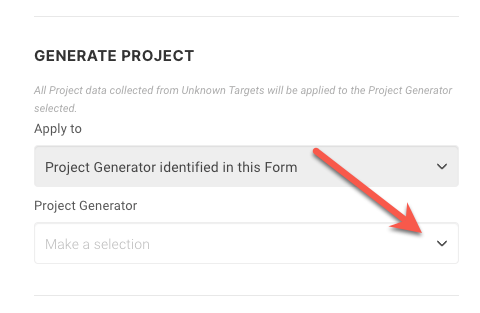
Once you have selected your Project Custom Field from the dropdown you can determine what Project the Custom Field will be added to, by clicking the Apply To dropdown.
Unknown Target
Project Generator - Select the Project Generator in the Project Generator Field. This option is the only option for unknown targets.
Known Targets
There are three different options for known targets.
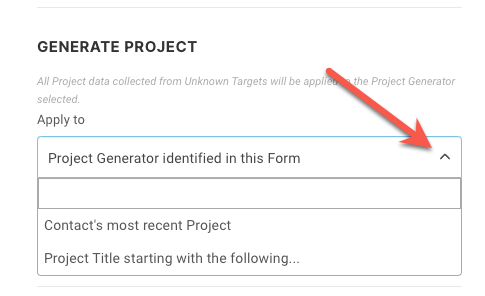
Project Generator - Select the Project Generator in the Project Generator Field.
Contact's Most Recent Project - This selection will add the Projects Custom Fields to the most recent Project.
Project Title Starting with the Following - This selection will provide a Search Box so you can select the relevant Project Generator.
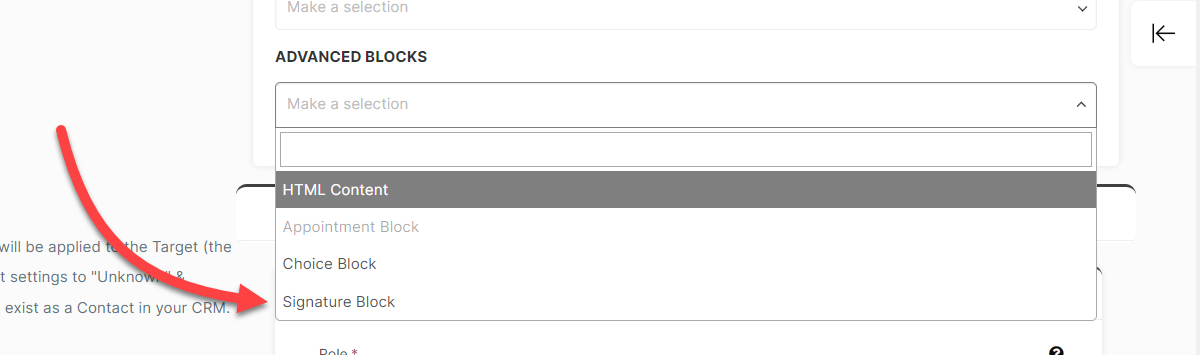
Advanced Blocks
You can use the Advanced Blocks dropdown to select a content block to insert before, after, or between fields in the form.
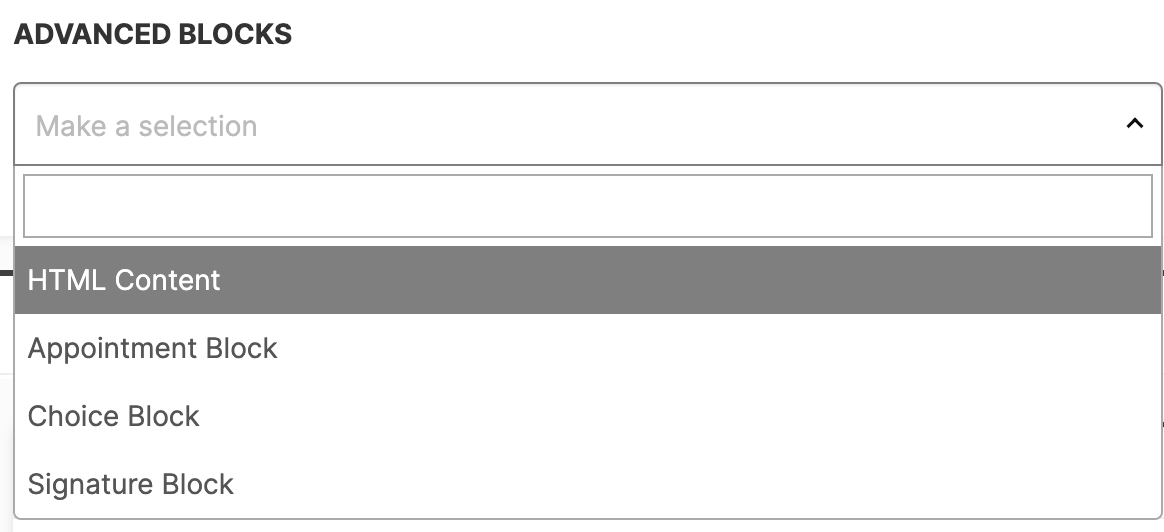
More information on HTML Content Blocks, Appointment Blocks, Choice Blocks, and Signature Blocks in the following sections.
Choice Block: How Do I Customize a Contact's Registration Based On Their Choices?
You can insert a Choice Block to allow a prospect or client to choose different paths while registering. For example, you could set up a choice of different subscription plans with varying prices. Or, you could add the contact to different circles with unique viewable content depending on their choices.
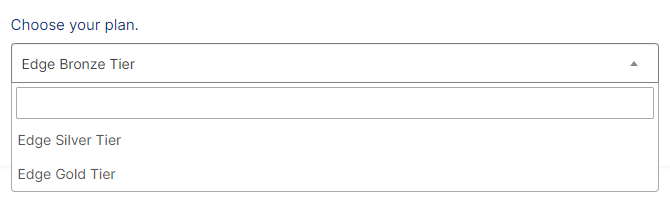
In action, this block will appear as a dropdown menu for the user to select from. How they will be registered into the platform will depend on which option they choose.
Select Choice Block from the Advanced Blocks dropdown menu.
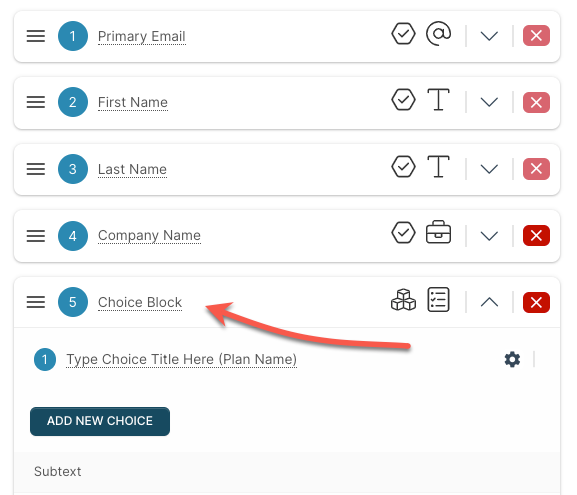
Once selected, the block will automatically be added to the list above with one choice by default.
IMPORTANT: When you add a choice block to the list, the "Form Actions" section will be removed. Instead, you'll be filling out this information for each choice by clicking the gear icon next to your choice options.
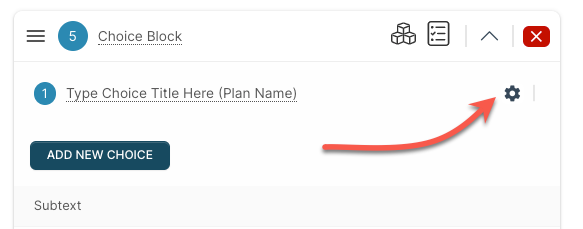
Click the icon to configure what will happen if the contact makes this particular choice. This is similar to filling out a Kickoff Form in which you choose the contact's role, coordinator, and optionally assign them to a circle, apply a folder generator, etc.
Click the Add New Choice button to add additional sub choice blocks.
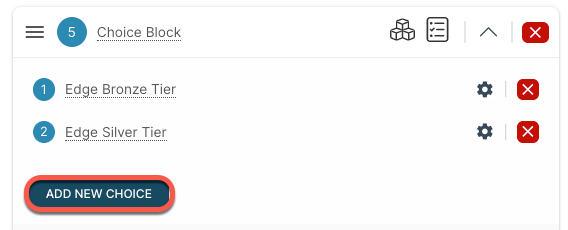
In practice, "Choice Block" will be the title of the field, and the choice options will represent what you can choose from the dropdown menu.
TIP: You can give contacts the ability to schedule appointments with specific appointment types in each choice option. In order for this option to appear, you will need to add an appointment block to the list of forms blocks first.
Appointment Block: How Can the Contact Book an Appointment While Signing Up?
When choosing either a prospect or a client as the role for your Kickoff Form, you can give the user the option of allowing them to schedule an Appointment while registering.
Select Appointment Block from the Advanced Blocks dropdown menu.
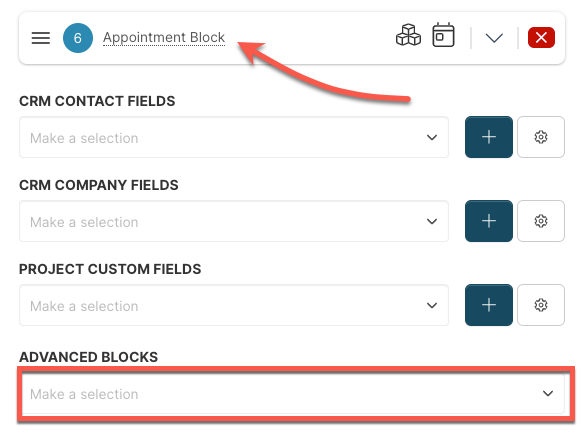
Once selected, the block will automatically be added to the list above.
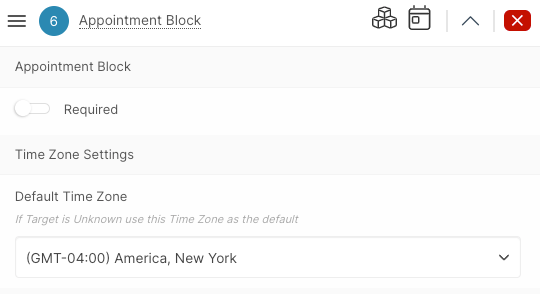
Use the dropdown to put in the default Time Zone for unknown targets.
Now go down to the Settings for the "Unknown" targets and add your Appointment Types in the Appointment Scheduling section as shown above.

Under Appointment Scheduling, you can select multiple Appointment Types using the dropdown.
HTML Blocks: How Do I Add My Own Content in Addition to Form Fields?
You can insert HTML Content Blocks that you can use to insert text, images, videos, etc. into the form. You can place these blocks before, after, or even in between fields and can add as many as you'd like.
Select HTML Content from the Advanced Blocks dropdown menu.
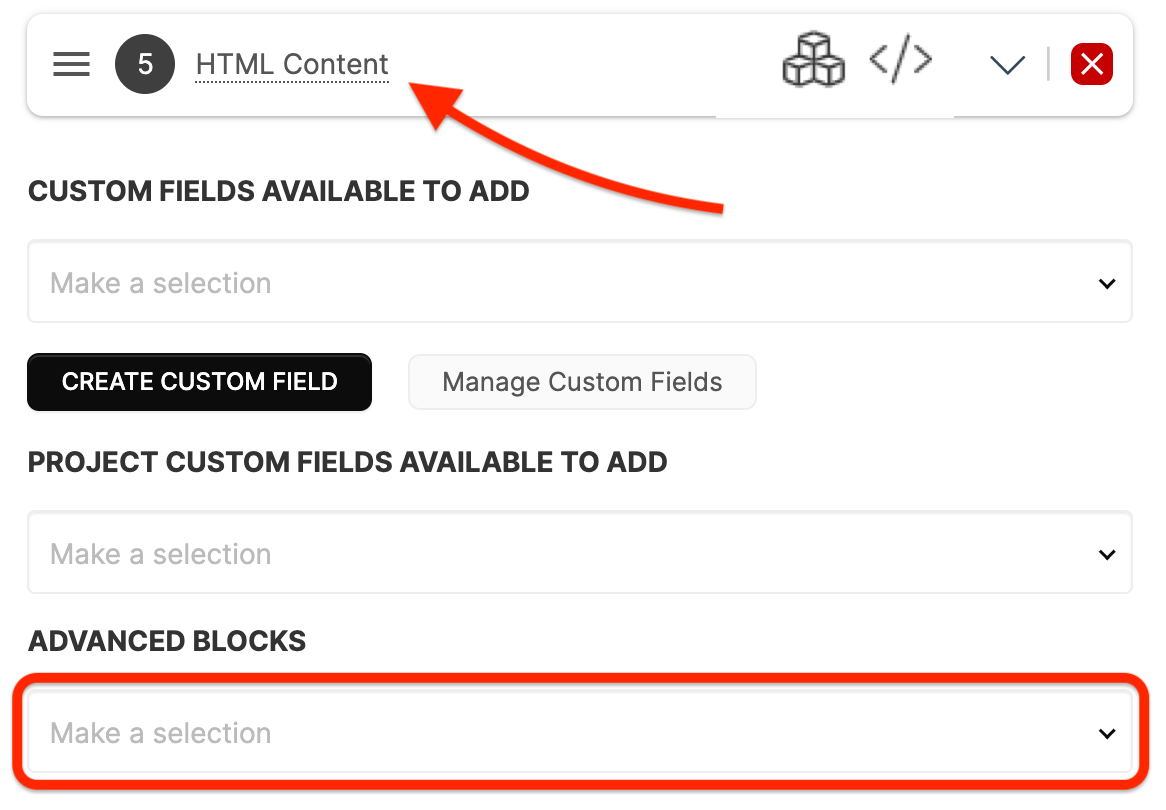
Once selected, the block will automatically be listed to the list above.
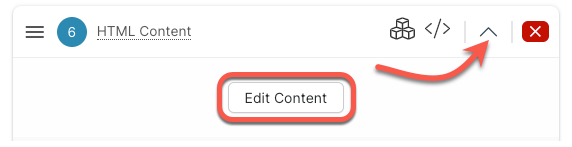
Once added, click the icon to expand the pane and click the Edit Content button.
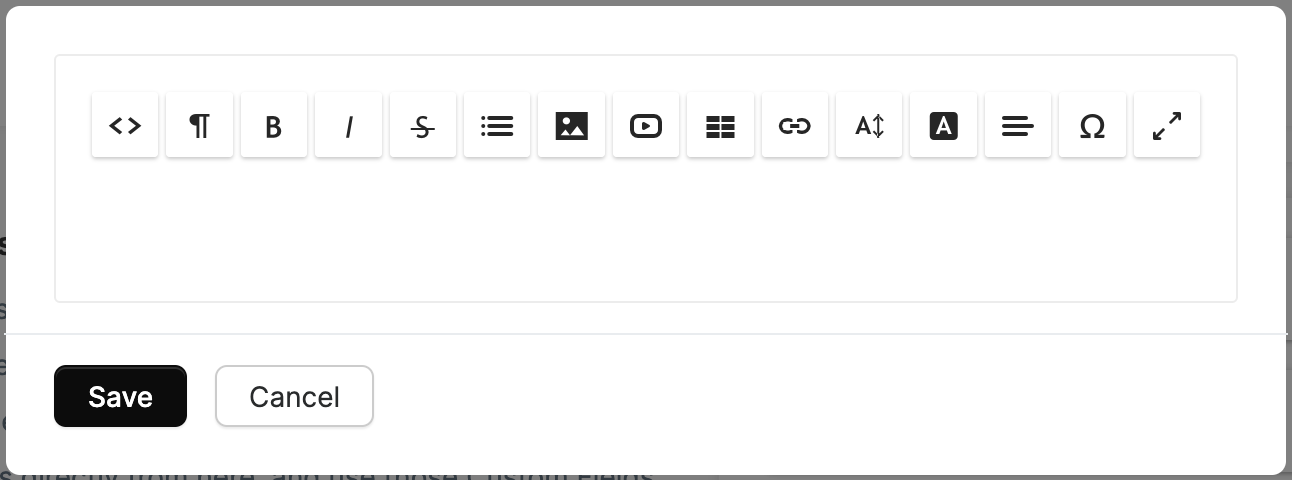
A standard WYSIWYG editor will appear in which you can add content. Click the <> icon to switch to HTML.
Signature Block: How Do I Add A Signature Area Field?
You can use a Signature Block in Forms to easily & quickly get important sign-off on agreement policies, or authorizations.
Get started by opening Advanced Blocks and selecting the Signature Block.
After you have added the Signature Block, click the arrow to customize the text/labels that appear on the front end of the Form.
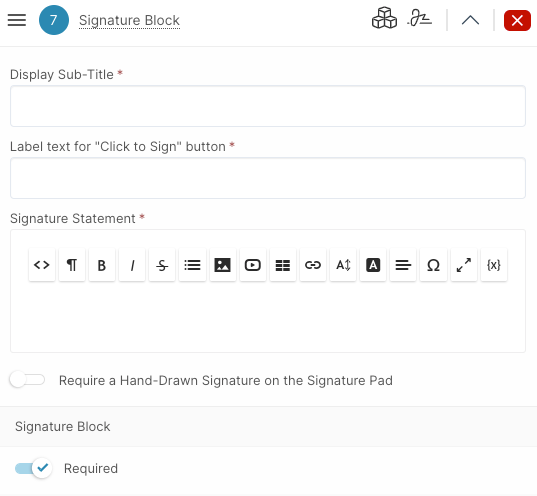
You can add multiple Signature Blocks to the Form and you are able to customize each one separately.
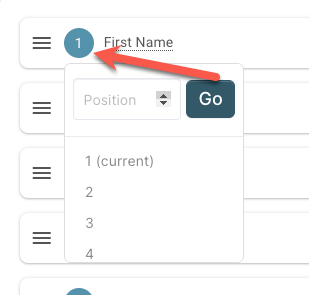
Ordering of the Form Fields
When adding Form Fields you can then re-order the Fields. To do this, either click on the three lines and drag and drop the field into the the correct order;

Or click the Form Field Number and change it to the correct order number;
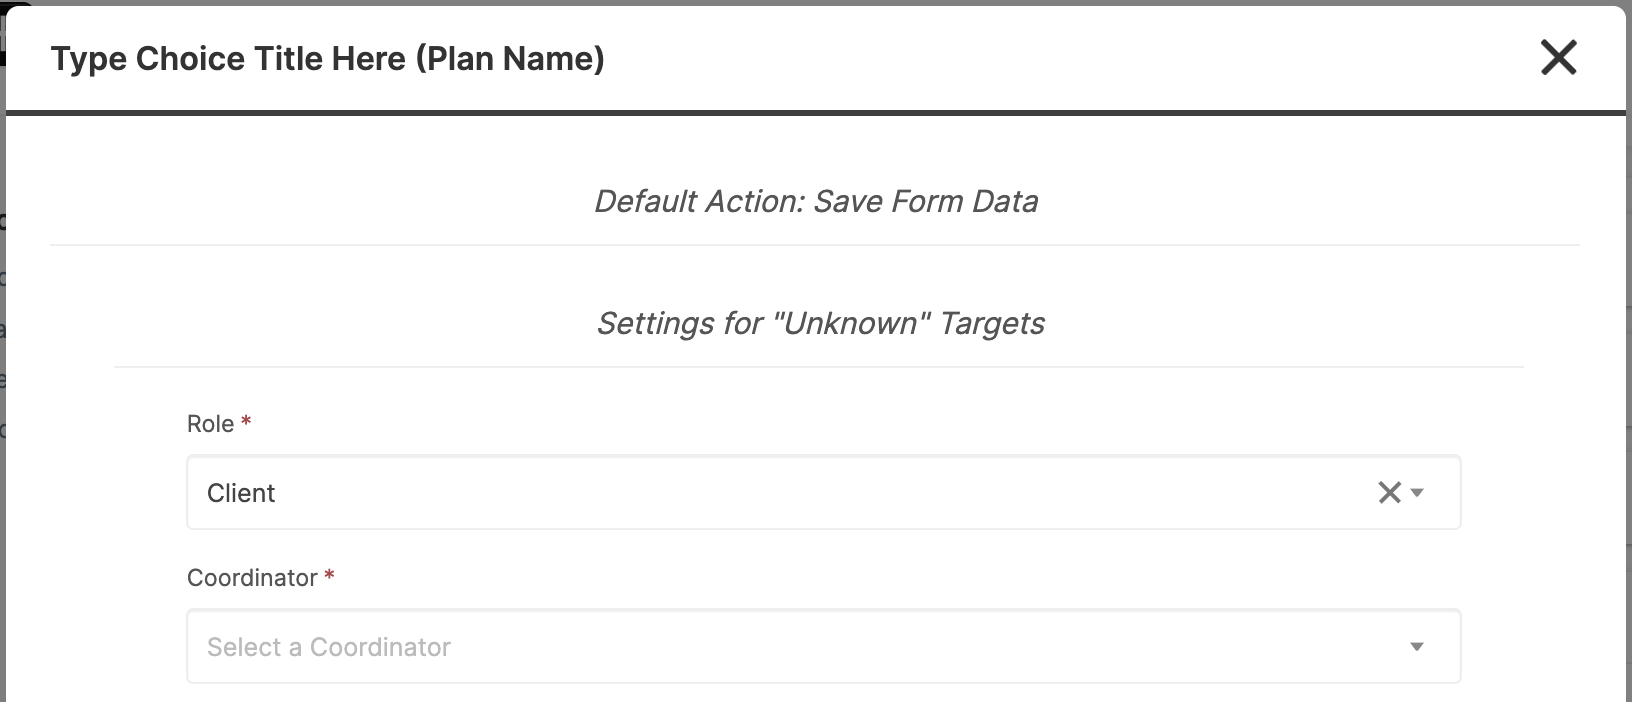
Contact Details for "Unknown" Targets
A new user who is filling out the Kickoff Form is an "Unknown" Target. This target is not yet in your CRM but will be added once they complete the form.
You'll need to set how this new contact will be entered into the CRM.
IMPORTANT: You'll need to decide if you want to implement a Choice Block into your form before filling out this section. If you add a Choice Block, these sections will disappear and instead will need to be configured within each Choice Sub Block.

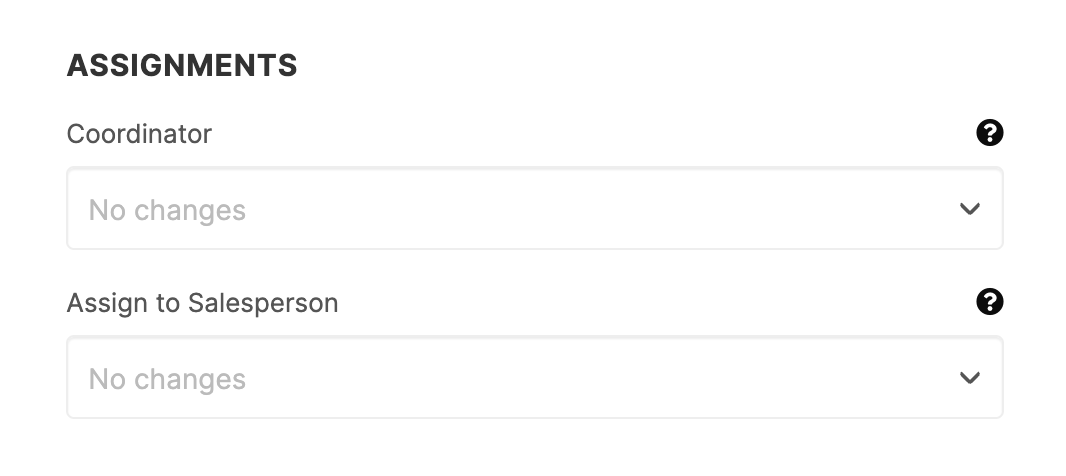
You are required to choose a Role and a Coordinator for your potential contact. The Assignments/Automation options available will depend on which Role you choose.
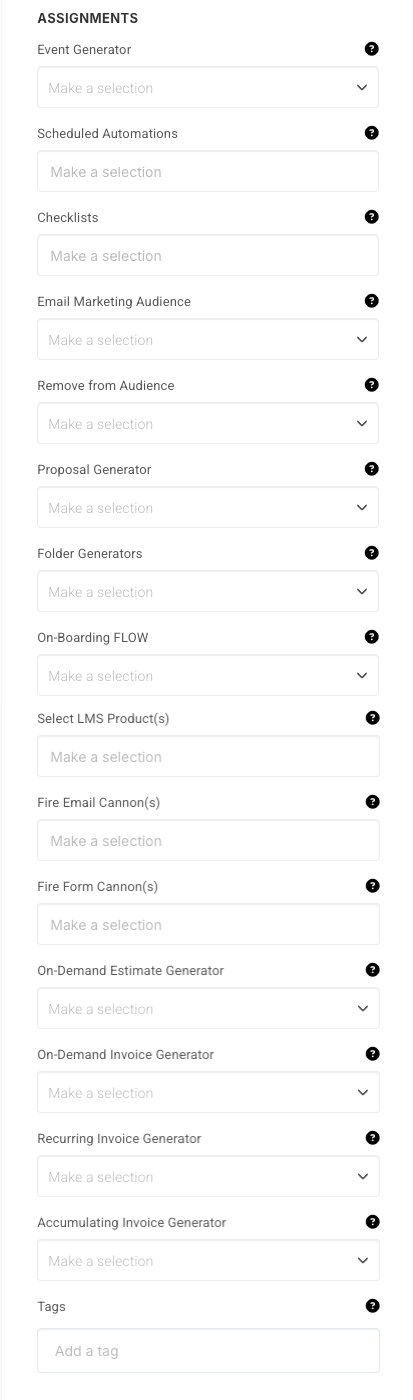
You can also choose to assign the contact to a Salesperson.
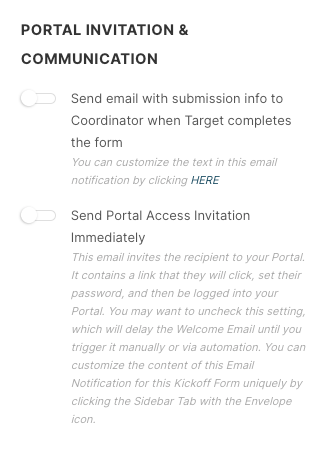
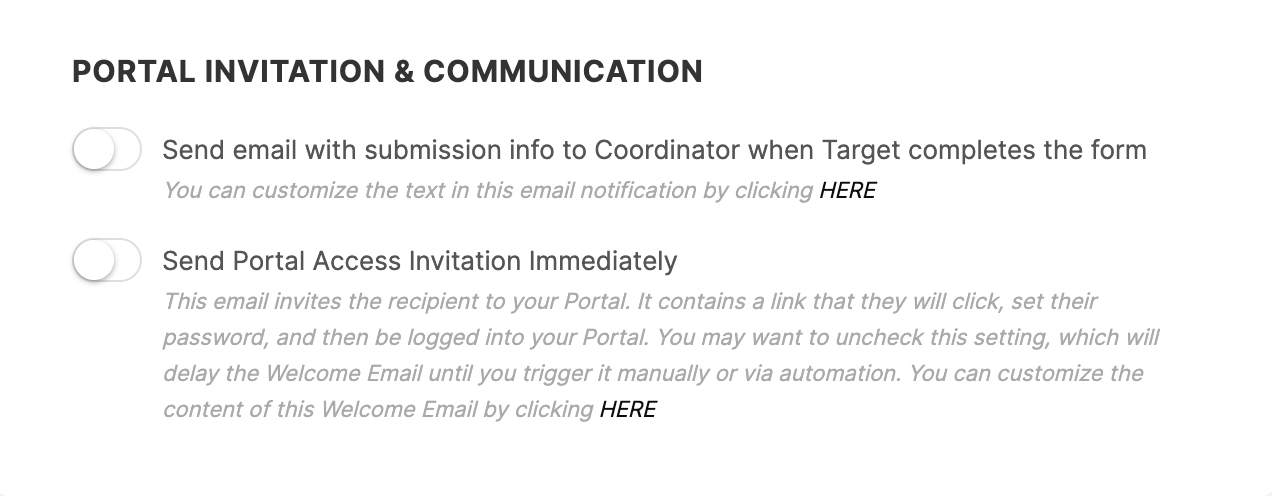
If you set the Role as Prospect or Client, you will have the options to Send Portal Access Invitation Immediately.
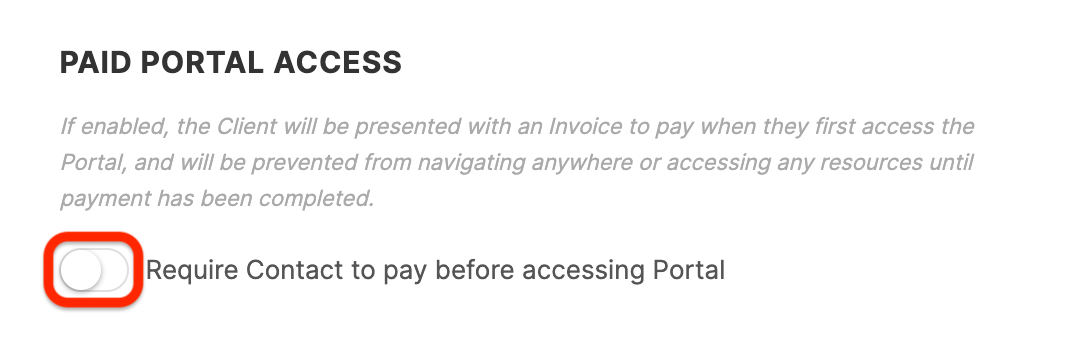
If you choose Client as the Role, you will also have the ability to enable Paid Portal Access, located in the bottom of the section. This will require clients to pay before accessing the Platform.
Contact details for "Known" Targets.
An existing user is a "Known" Target. This target is already in your CRM.
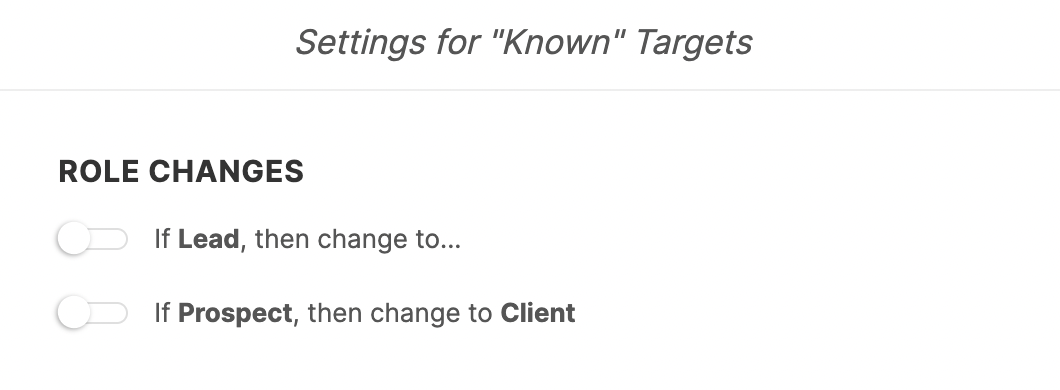
You can have an existing contact's information updated as a result of completing this form. If you would like to use this Kickoff Form for Role changes you can convert a lead to a prospect or client and a prospect can be converted to a client.
If you would like to update the contact's Coordinator or Salesperson assignment you can do so here.
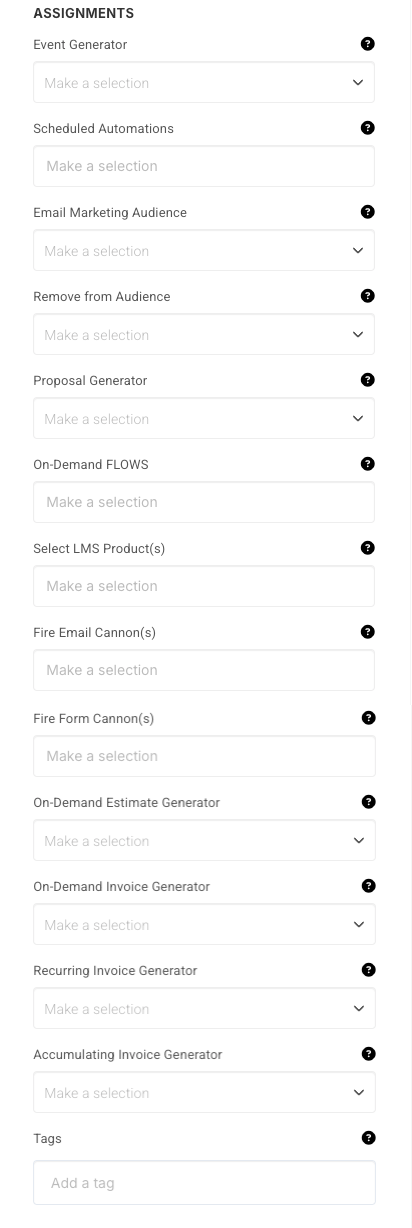
You can also trigger assignments to the target, such as an Event Generator, Email Marketing Audience, Project Generator, and more.
If the known target is a prospect or a client an On-Demand FLOW will be an option as well.
You can choose to send an email to the Coordinator when the known target completes the form. You can also choose to send portal access immediately. Don't toggle this on if you want to send the Welcome Email manually or via an Automation.
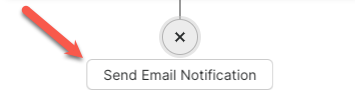
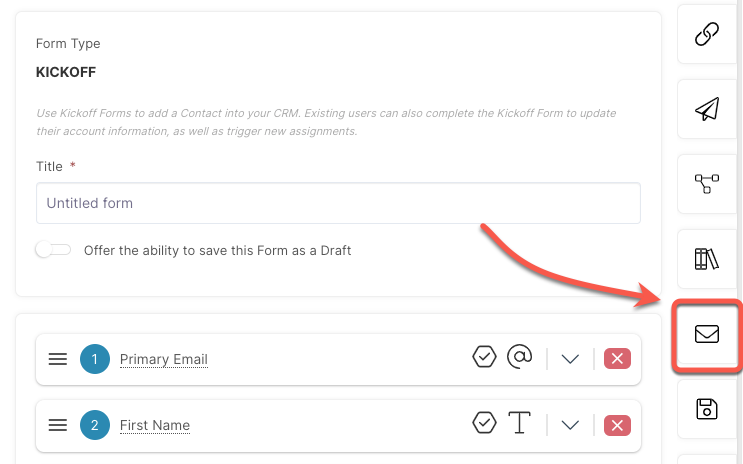
How Do I Send Email Notifications?
Click the + icon at the bottom of the form to reveal the Send Email Notification button.
You can assign the Email Notification to one or many Users;
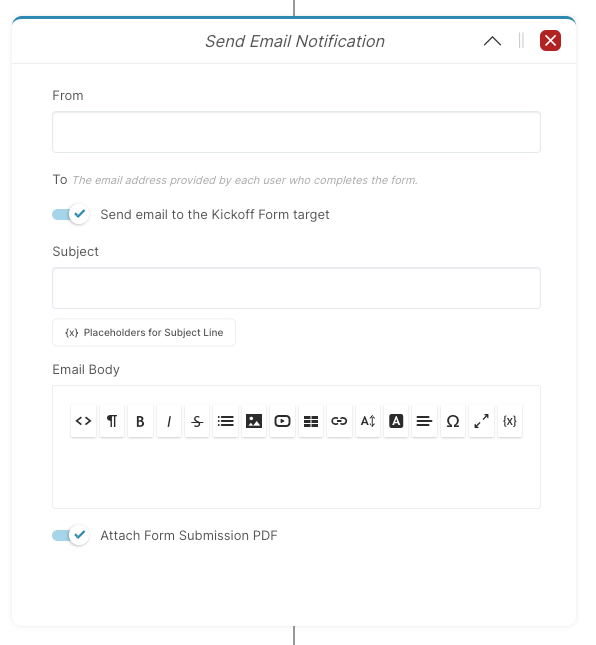
If you choose to send an email notification there is a toggle that allows you to send it to the target of the form. When toggled off you can select multiple users to send the notification to.
In the body of the email you can customize your message and use {X} Placeholders to send specific information including form field data.
Additionally, you have a toggle for 'Attach the Form Submission PDF' if you would like to include a copy of the form submission with the email.
How Do I Configure Conditional Logic for Fields?
Conditional Logic: Allows you to create a form that changes based on user input. Depending on what the target (user who is filling out the form) enters into a field, it can trigger whether or not to show or hide a different field.
All Custom Fields (with the exception of the "file upload" type) can be configured to trigger conditional logic. The Appointment Block can also be configured with conditional logic. This allows you to hide the appointment block on a form so it only shows up if the target completed the necessary requirements.
While in the editing screen, you'll see a tab to the right of the screen with an icon. You can click on this at any time to open a side panel, in which you can then configure your Conditional Logic.
How Do I Change the Welcome Email?
On the right side, you will see a button with an envelope icon. This is where you can edit the Portal Access Invitation.
Your saved Portal Access Invitation for internals and externals will still remain in Email Templates, but this allows you to change the Welcome Email specifically for the Kickoff Form you are working on.

You can edit this template just like you would any of the emails in Email Templates. Keep in mind that this Portal Access Invitation is only for the form you are currently working on. Any edits made here will not affect your Portal Access Invitation Templates in Email Templates.
How Do I Switch Between Forms?
On the top right you will see a dropdown. It will be titled the name of the current form you are working on. You can easily switch to a different form and a different form type by clicking on the dropdown and selecting one from the list.

How Do I Use/Embed/Link a CRM Kickoff Form?
On the Link / Embed screen, you will have two options to share your form. These options are Direct Linking via URL, Direct Linking via QR Code, or by embedding your form on your external website or internal content pages via HTML or Placeholder.
Direct Linking Options
The first option you will see is Direct Linking options and settings for Friendly URL.
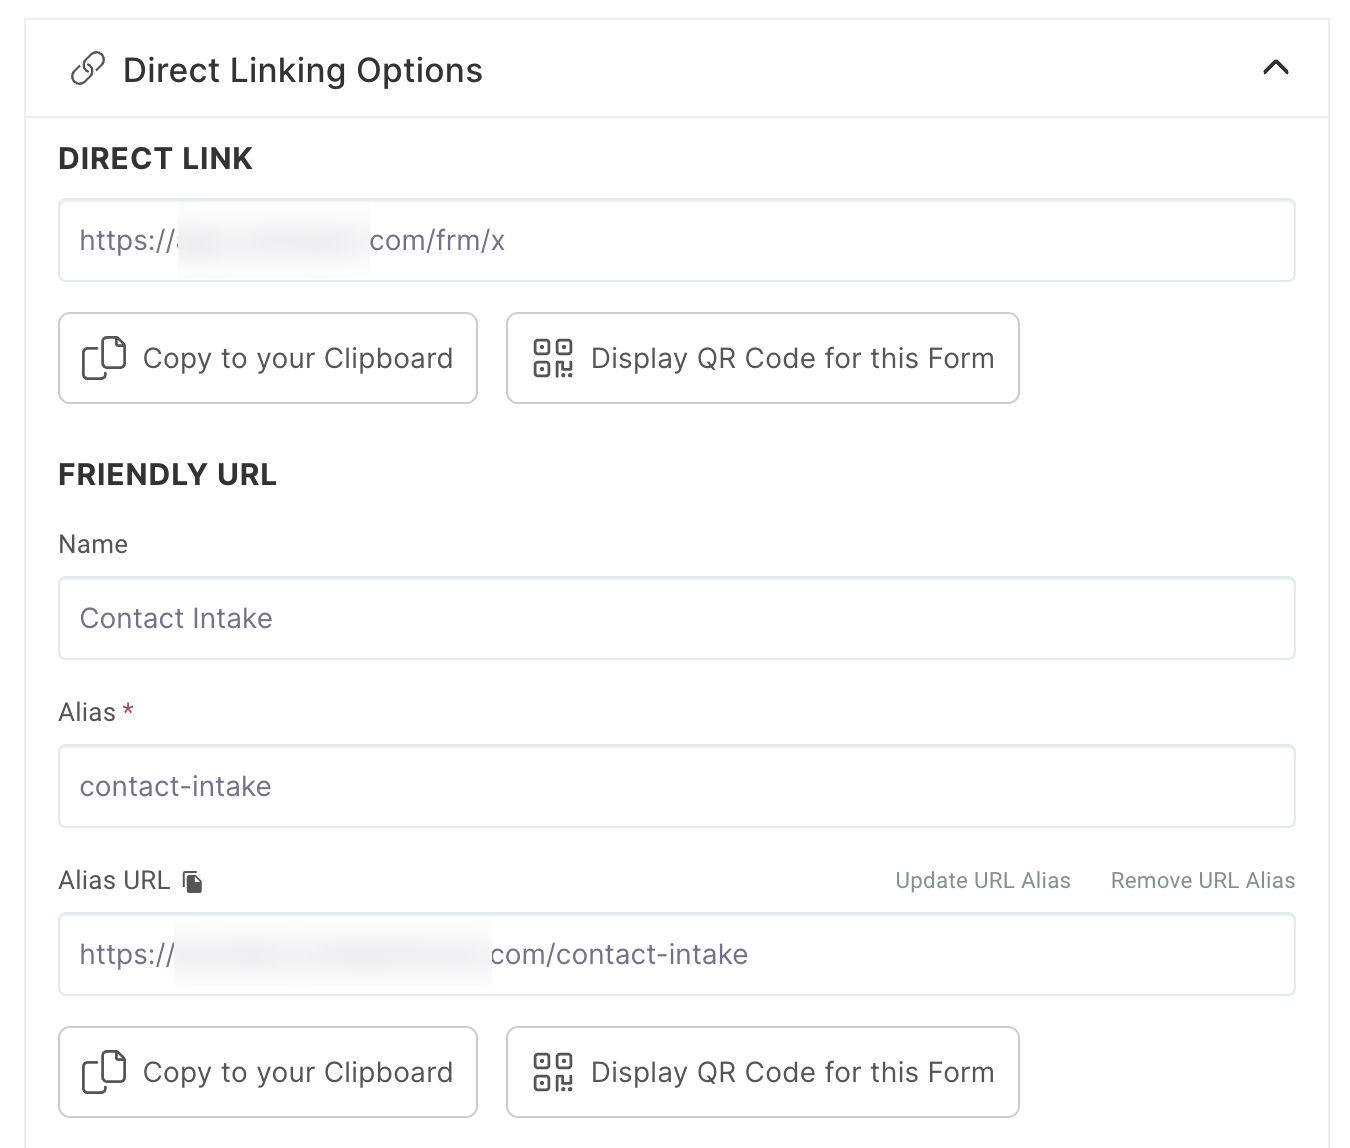
Here you can set your preferences on how you will link to your Kickoff Form.
Direct Link: Simply copy this link and share it wherever you'd like. This code is pre-generated and cannot be updated. If you have a custom URL, this will reflect your set domain.
QR Code: You can select the Display QR Code button to open the sidebar details with your QR Code and download options for PNG and SVG. You can customize the look of your QR Code in Platform Branding.
Friendly URL: If you have your custom URL configured, you can create a Firendly URL.
Embed Options
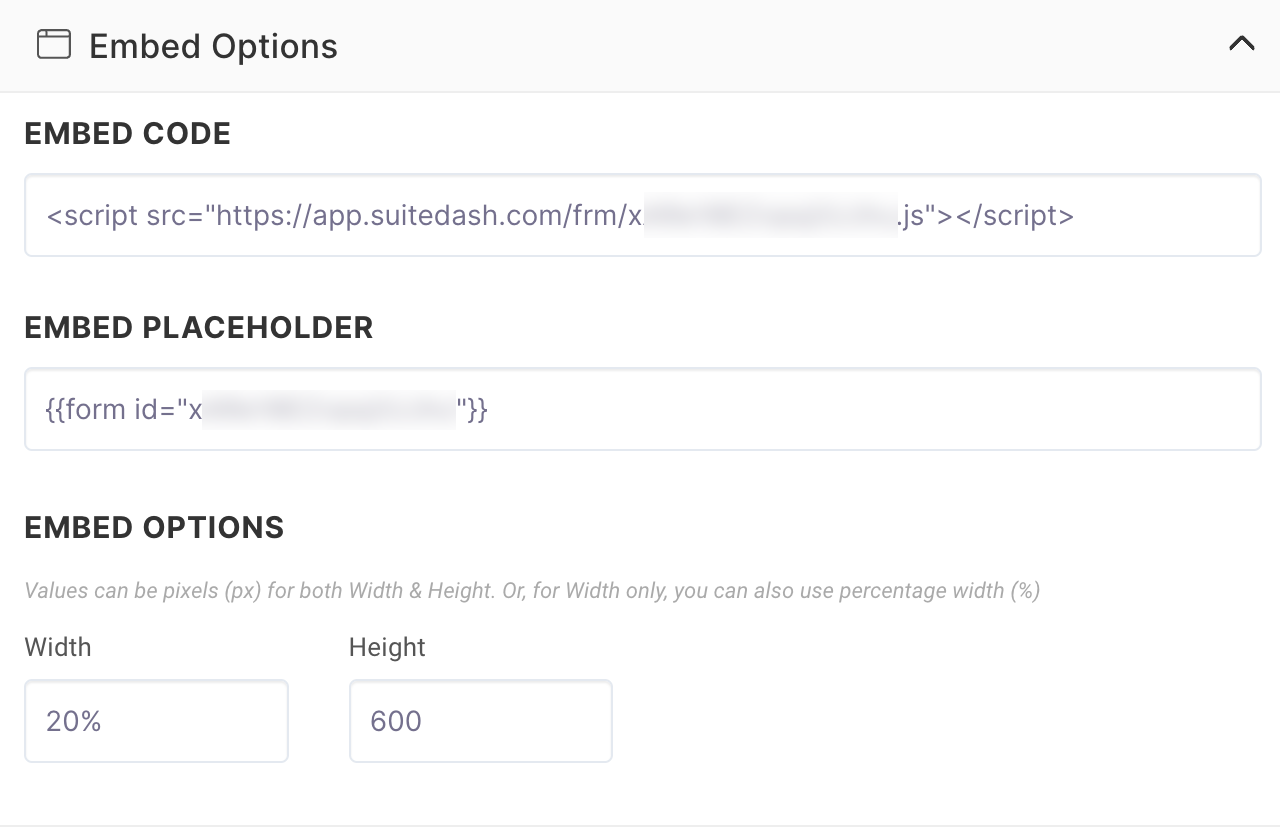
Embed Code: Use this HTML code to embed your form outside of the platform, such as a page on your website.
Embed Placeholder: Use this placeholder code to embed your form within the platform, such as a Portal Page.
Width: Set the Width and Height of your form when it is embedded using the code or placeholder.
How Do I Submit a Form for a Contact?
In some cases, you may want to fill out a Kickoff Form in place of a contact. A customer may call you on the phone, for example, and have you set up their account for them. This is where Staff Submit comes in.
In the Forms List View, just click the Options menu button and select Staff Submit.
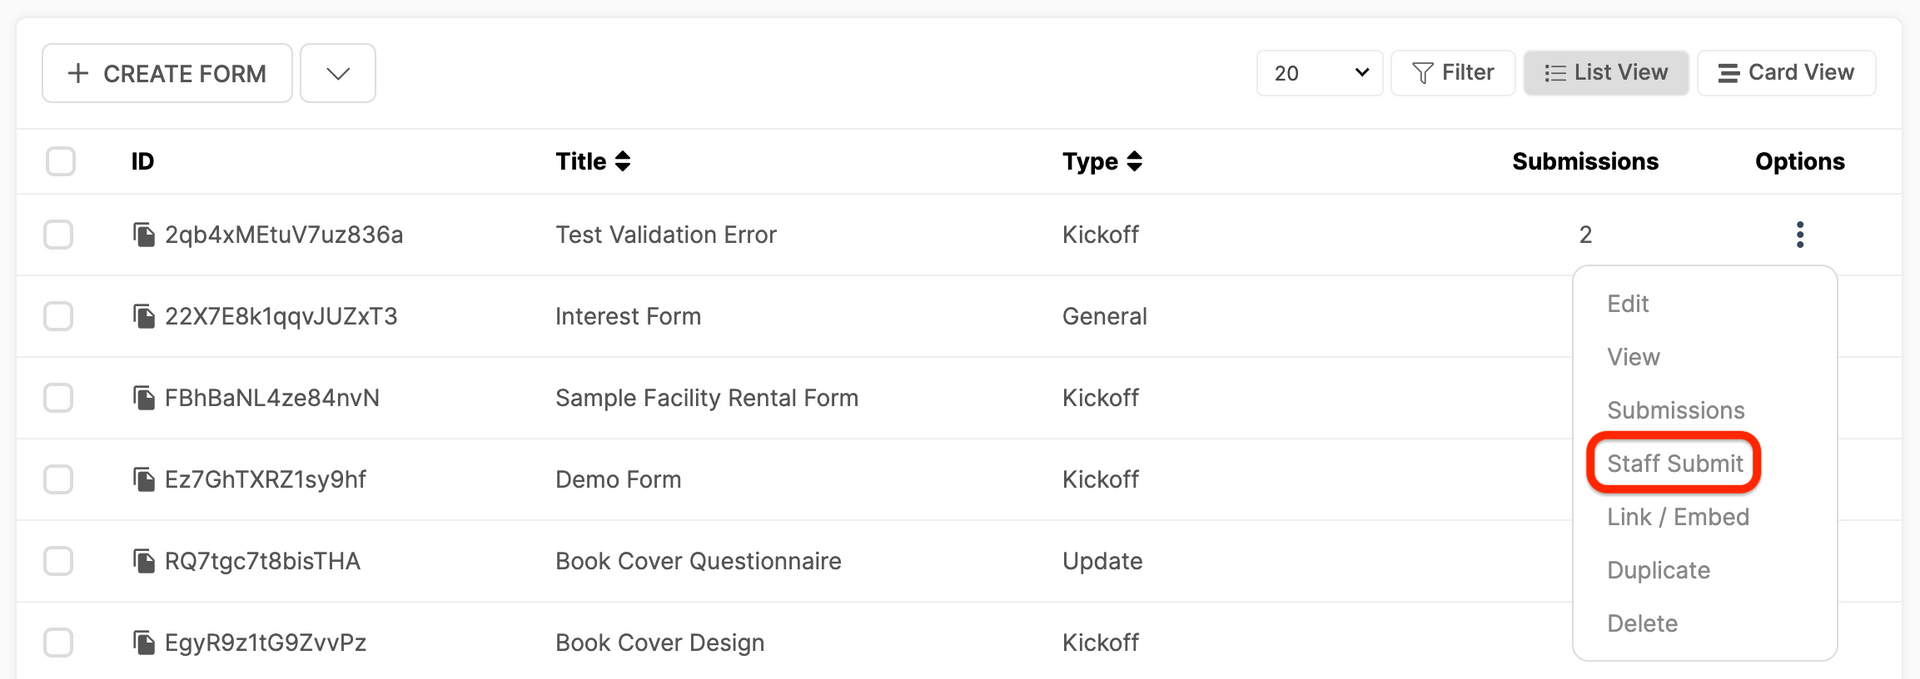
This will open the form in a new tab for you to fill in the details. The contact will be added to the CRM just as if they had filled it out.
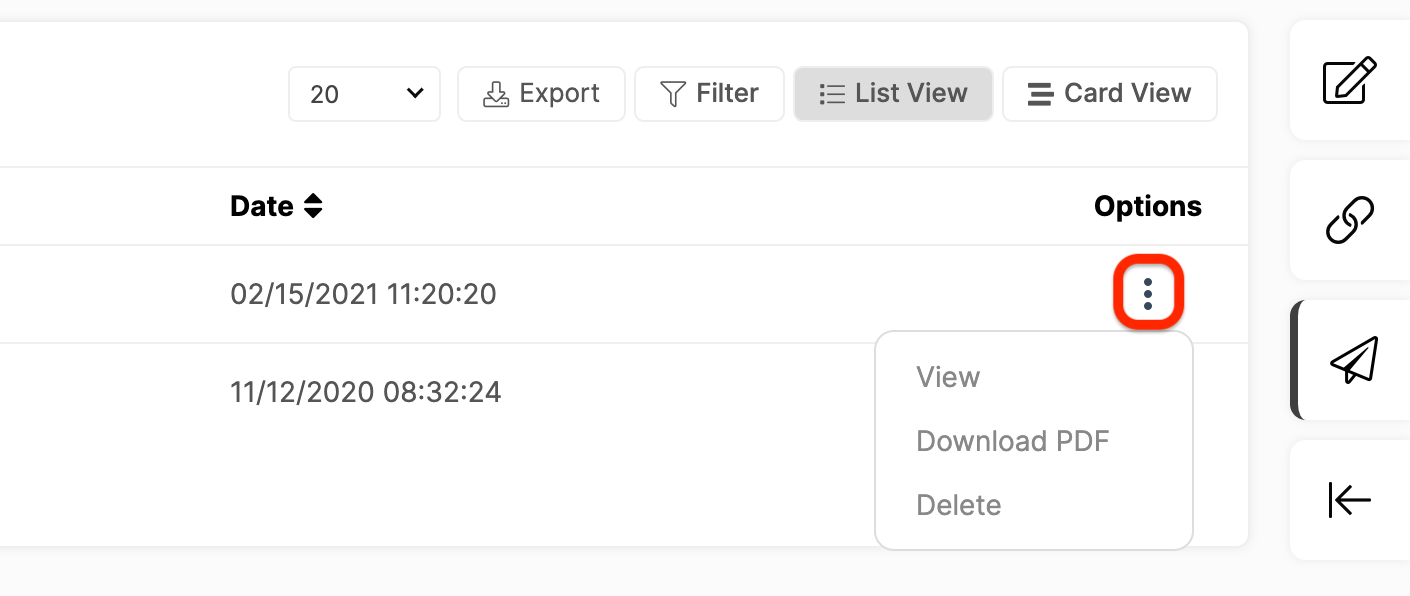
How Do I View Submissions for My CRM Kickoff Form?
While viewing Forms, click the Options menu button and select Submissions.
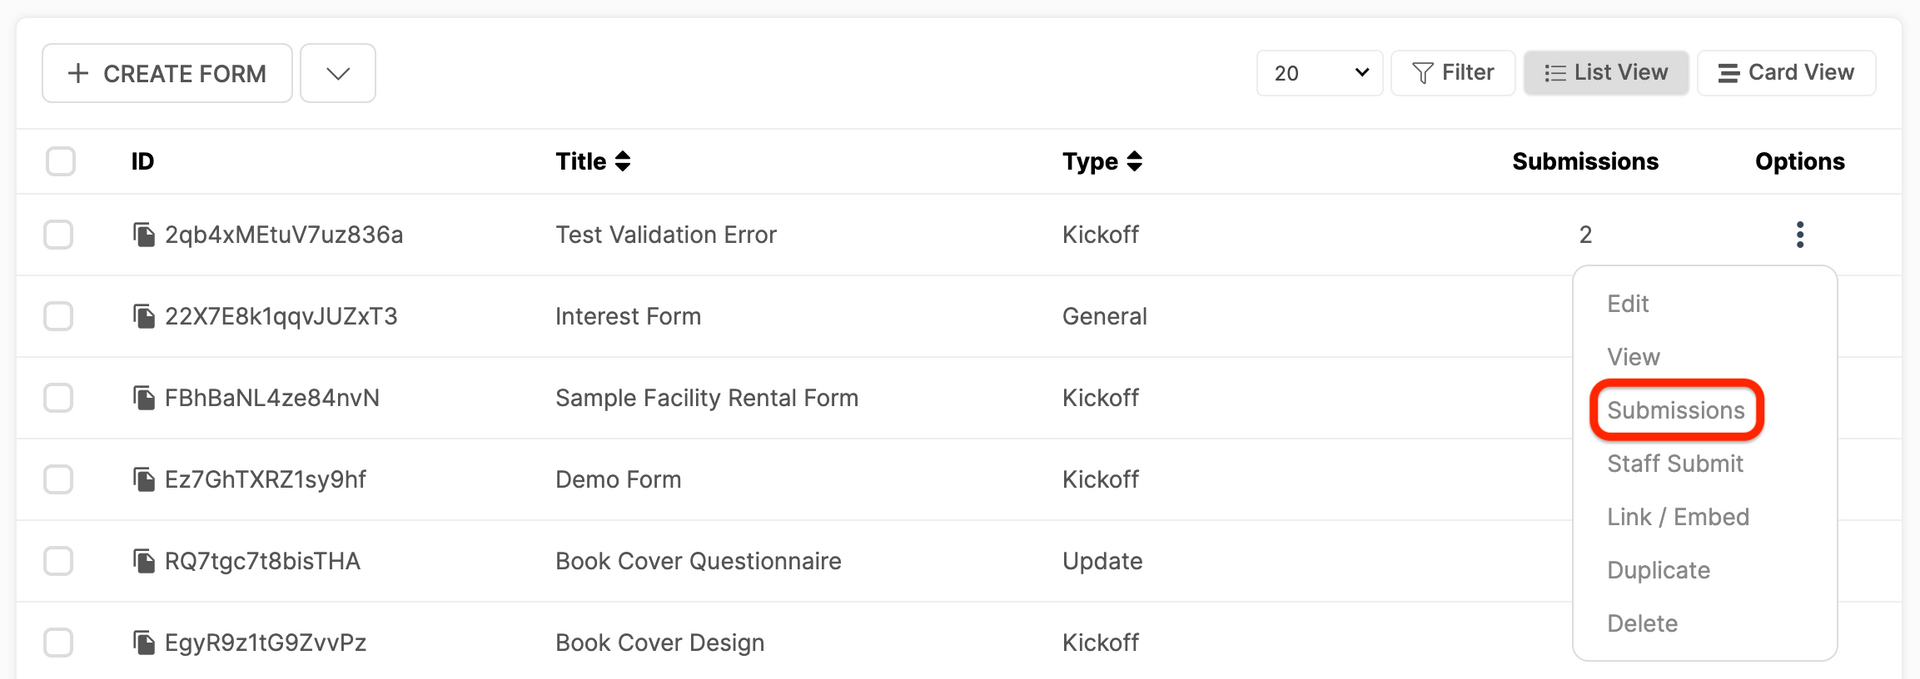
Alternatively, you can click the Submissions button while editing the form, located on the right-hand corner of the screen.
The precise date of each submission is displayed.
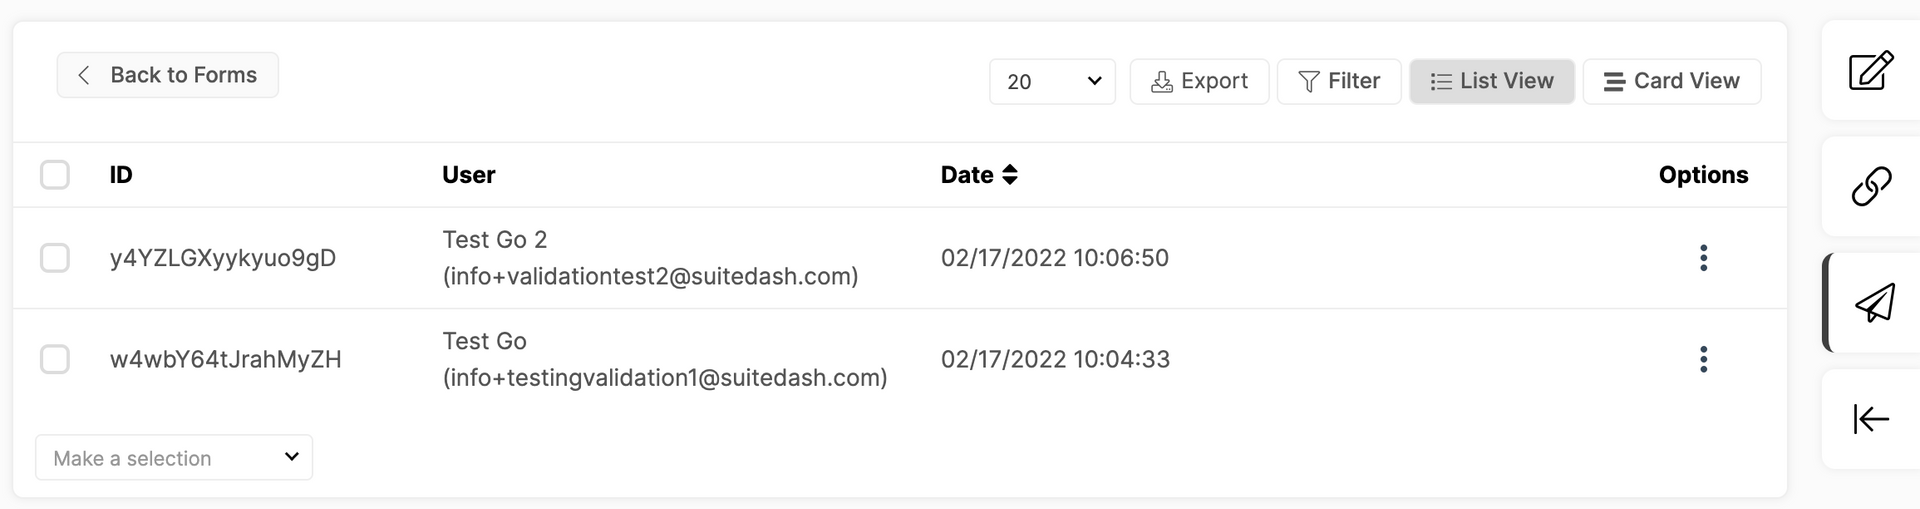
To view the submissions, just click directly on the row, or click the Options menu button and select View.
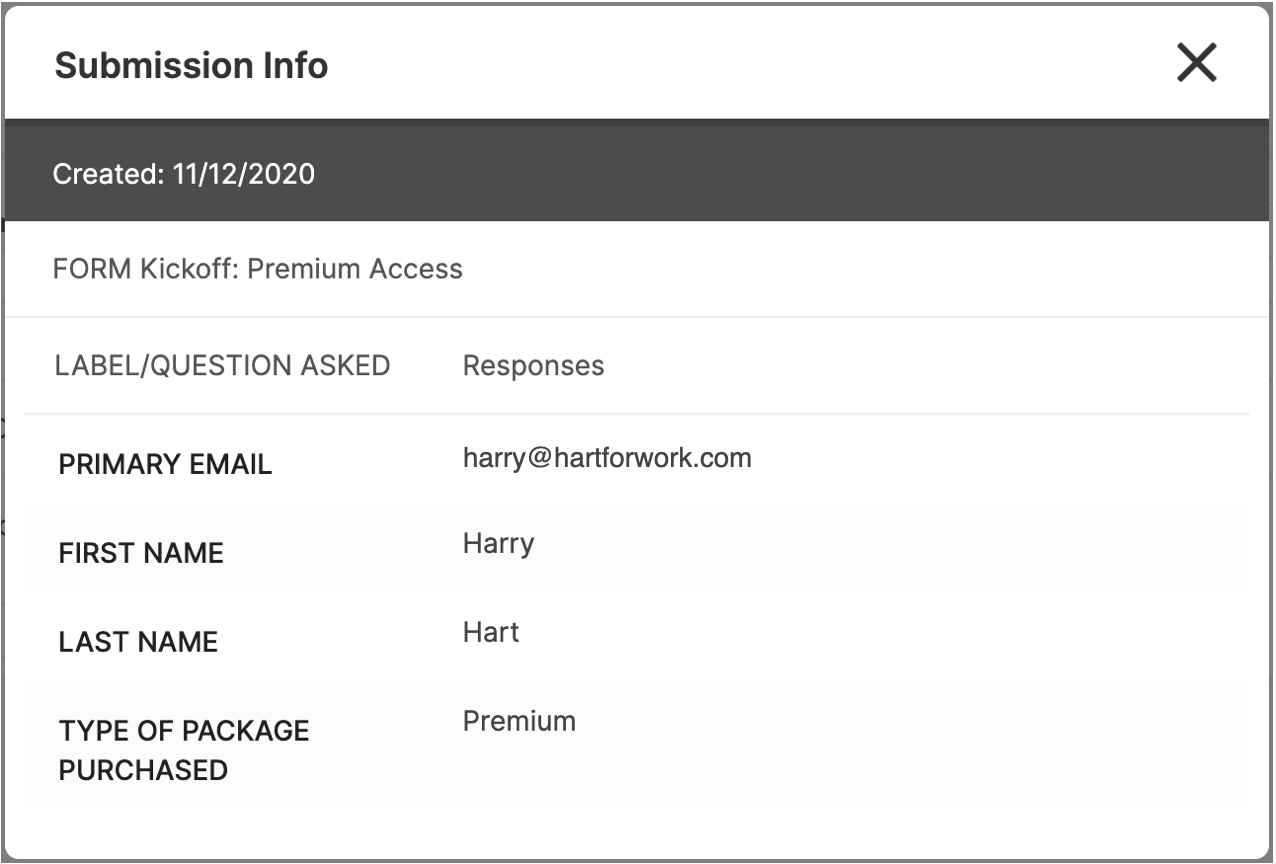
Click the Options menu button to view, download a PDF version, or delete the submission. This will not delete the contact.